Night Time Photography 101
I’ve been really impressed with some of the photos I’ve snapped on my phone and the automatic setting on my awesome DSLR has produced some stunning shots. When I’m photographing my children a quick auto shot is often the only way to capture the moment.
But what if I was going on the holiday of a lifetime? Wouldn’t it be a shame to trek all the way to my dream destination with only a smart phone to capture its beauty? My DSLR would almost certainly do my subject more justice, but what if the day I travelled there the lighting was tricky or what if I was going somewhere that the lighting was the subject, like The Northern Lights? I’d need at least some basic knowledge of manual settings to have a chance at that champagne shot!
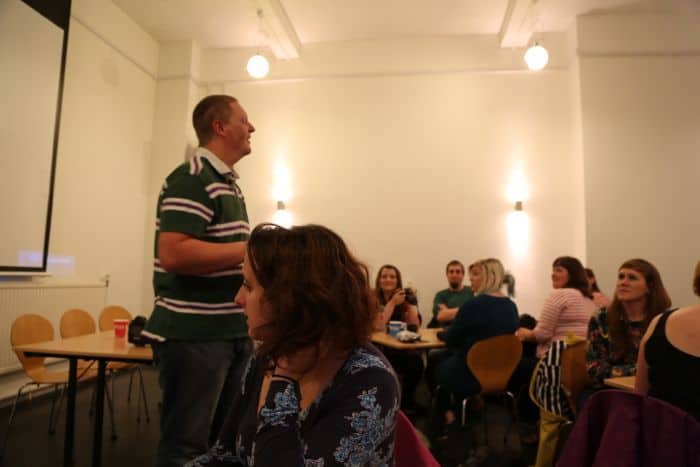
I headed to Chapter in Cardiff along with a select group of bloggers to learn more about getting our cameras off automatic and onto the manual setting with particular reference to night time photography. The course was led by Simon from Iguana Photography, a member of the Royal Photographic Society.Here’s what I learnt.
Set your camera to manual
Scary I know but bear with me. The results might even be worth it!
There are 3 elements to consider.
- ISO which affects noise or grain,
- Aperture which affects depth of field and
- Shutter which affects motion
1. ISO
The ISO speed refers to how quickly light is absorbed. Setting your camera to 200 is a good start. Don’t change unless you know what you’re doing as it can impact on quality. A higher number will give a more grainy or noisy result.
(Grainy and noisy are basically the same thing and are not desirable. If a photographer tries to sell you on a lovely grainy shot he’s taken of your kids, he might well be trying to cover up a mistake!)
2. Aperture
Your aperture controls the depth of field, i.e. how much of the shot is in focus.
Aperture is measured in f stop. The lower your f-stop the less of the shot will be in focus, so to achieve a lovely sharp foreground with a blurred out background, you need a low f stop number. Try f2.8 and below for good depth of field.
You’ll need to select a higher number when you want more of the scene in focus, such as for a landscape shot.
3. Shutter Speed
The shutter is the part of the camera which protects the sensor so when you take a photo it opens to expose the sensor to light.
For fast motion you need a very fast shutter speed – up to 1/2000 of a second.
For our exercise we want to capture our shot in low light, so we use extremely long shutter speeds of up to 30 seconds!
Night Photography
Automatic’s fine right?
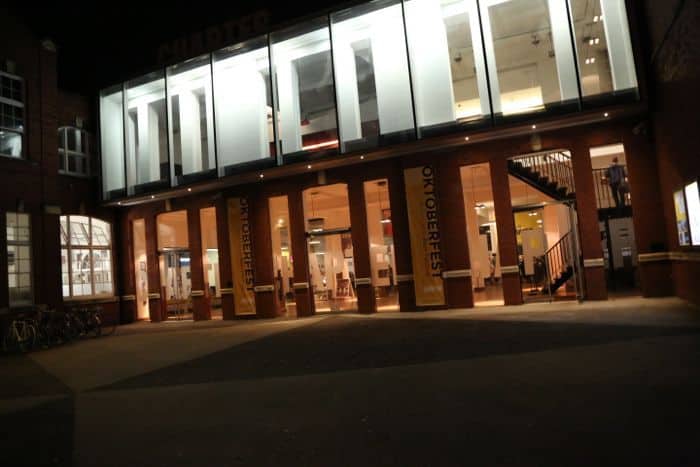
This photo was taken in full automatic mode without a flash as I wanted to compare the difference to see if I actually could get better results using manual settings. Considering it’s night time and the light levels are poor I wasn’t displeased with this attempt. The ‘Oktoberfest’ writing’s reasonably in focus, there’s plenty of light, but it’s definitely what I’d think of as a snap shot. It would be handy as a reference shot to help remind me of somewhere I’d travelled to, but its never going to be featured in a glossy magazine.
Now to switch the camera to manual . . . .
Blurry night time shot – what went wrong?
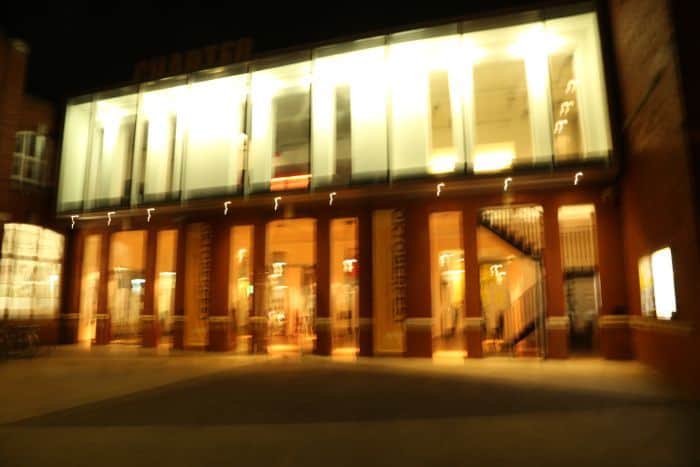
OK so my first attempt at manual wasn’t great. The photo was taken using an ISO setting of 200 and an f stop setting of f10 (as suggested by our expert). The exposure length was a massive eight seconds. I was hand holding the camera and like to think I normally have quite a steady hand, but evidently I’m not quite as steady as a tripod and certainly can’t hold the camera still for that long – hence the blur!
How to fix the blur?
Use a tripod to keep the shot steady. I don’t generally carry a tripod for stills photography. Scrap that I NEVER use a tripod for stills photography (except on the rare occasion when I need to photograph myself and nobody else is around to hold the camera), so what’s the alternative?
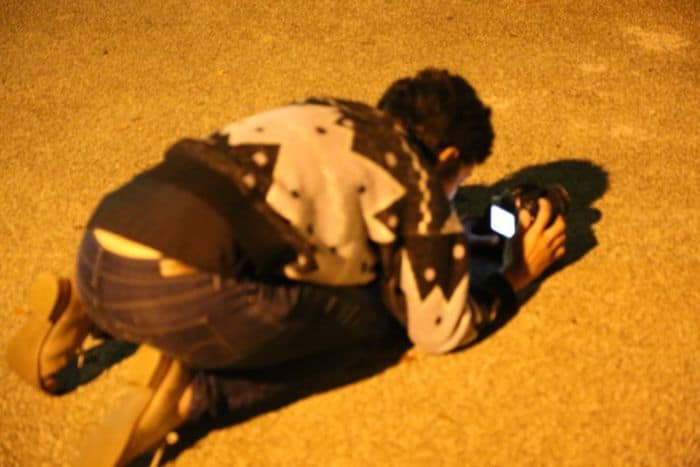
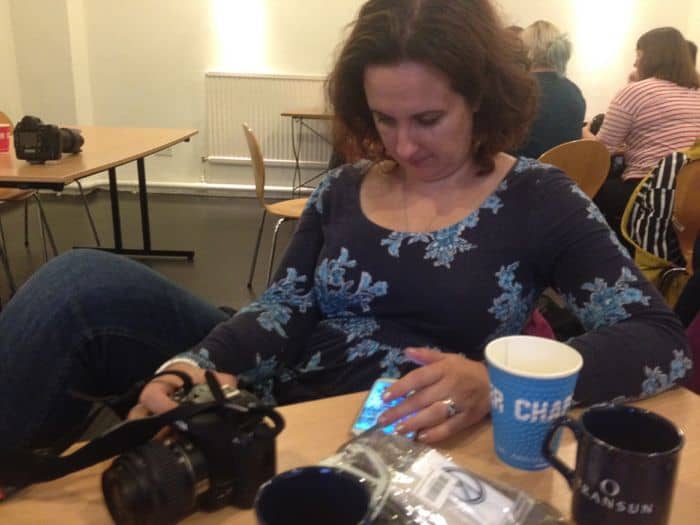
Rest on the floor or a table or even on a nearby bin! Use whatever you can find nearby to steady the shot. There were plenty of bloggers in this uncomfortable pose at the workshop but wow, it’s effective – a great tip!
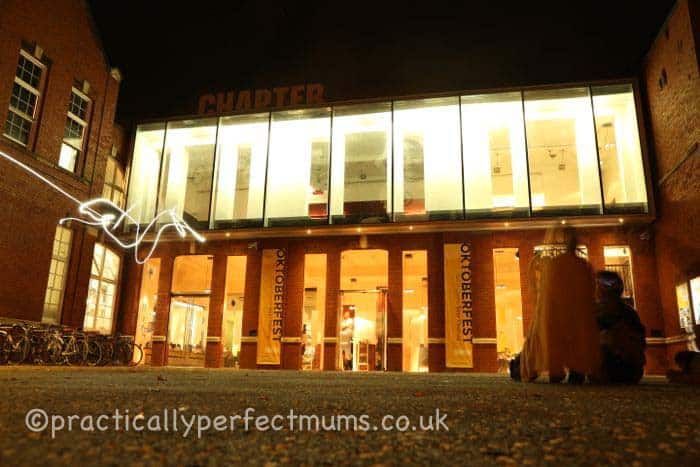
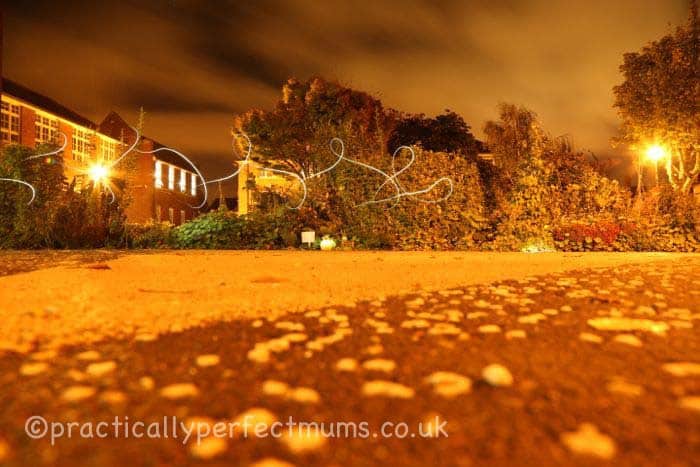
Cool Night Writing Effect (Below)
So let’s try again. We wanted to achieve night time light drawings – Simon walked right across the shot ‘writing’ with the torch on his iPhone in the sky. This time I’d made the exposure even longer, thirty whole seconds, which had the effect that you can see the ‘writing’ but not Simon.
Comparing it to the auto shot above, I can see how much more interesting this shot looks. The photo taken on auto looks flat and cold. This shot seems warmer and more rounded, making the Chapter building look cosy and inviting!
OK, so it’s not perfect, but you can see how it would be a pretty cool effect if it worked properly and it gives you an idea of what an amazing effect you might achieve if you used this technique to capture the Northern Lights!
Learning from Mistakes
It was great fun practising night photography and the shots which didn’t work helped me to understand more about what could be achieved. Using the floor as a tripod, I tried to capture an atmospheric moon shot but I missed the moment and the clouds scuppered my attempts. Patience was required but time didn’t allow for that so I look forward to reaching for the moon another night.
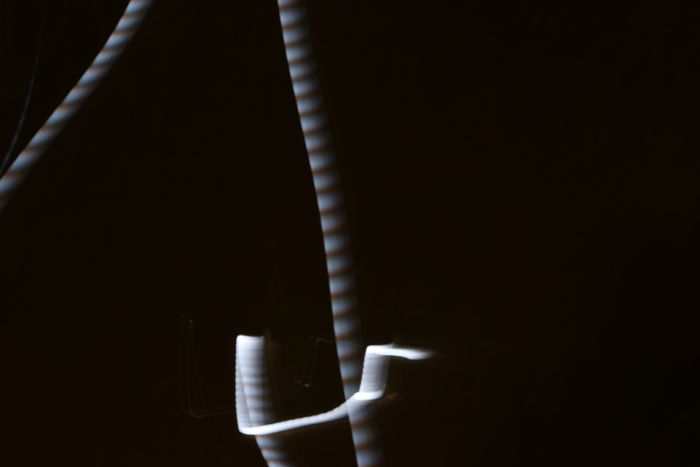
In the shot below, I accidentally moved the camera while taking a long exposure shot but I think the effect is interesting and I’m sure I could find a use for the technique – maybe writing by moving the camera instead of moving the light source?
And finally this was my ‘champagne shot’. It’s not perfect but I was pleased that I managed to capture the writing. I like the texture of the pavement (with which I became quite intimate as I spent a fair bit of time lying on it!) and I love that amazingly atmospheric sky.
I’d like to thank travel company Transun who laid on the photography workshop. They offer Northern Lights experiences deep in the Arctic Circle of Northern Finland and Sweden and the photography tips are designed to help us get the most out of these amazing destinations, but of course these tips could be handy for any night time photography setting. If you’d like to find out more, there are tips specifically relating to photographing Aurora Borealis in Transun’s Night Photography Blog.
There’s also a handy Photography Fact Sheet which is a great point of reference for getting to grips with manual settings.
Back at home with bonfire night coming up, the children and I are looking forward to experimenting with sparklers to create more night time writing.
How about you? Have you achieved any interesting or unexpected results with the manual settings on your camera?
Feel free to check out my Pinterest board if you’d like to join me in braving the manual settings on your camera!

I can’t wait to get me a proper camera and do some classes to learn how to use it properly!
I have given up using auto which I am quite proud of and I have almost mastered Close-up on my Cannon lol x
I really want to do a photography course – there was a fabulous blood moon when we were on holiday but all i got were blurry shots and i was gutted
Fantastic post – thank you.
I need all the knowledge I can get when it comes to better photography.
I have so much to learn when it comes to getting my camera off auto! I am starting to understand more and more and the big part for me is trusting myself
I have never stepped away from auto – but am def going to give it a go – great post!